If you want to know how to clean a hamster cage properly — not just quickly wipe it down but actually clean it the right way — you are in the right place. Most owners either clean too rarely and cause health problems, or clean too aggressively and cause serious stress. Both extremes harm your hamster.
This complete guide covers every cleaning task your hamster’s cage needs, how often to do each one, which products are safe, and — crucially — how to clean the cage without destroying your hamster’s sense of home.
| ⚡ Quick Answer — Hamster Cage Cleaning at a Glance: Daily: Spot clean soiled bedding + change food and water Weekly: Replace 30–50% of bedding + wipe cage walls + wash toys Monthly: Full deep clean + disinfect entire enclosure + replace ALL bedding Keep a small handful of OLD bedding to mix into fresh bedding every time. This scent retention is critical — it prevents stress and reorientation anxiety. |
Why Cleaning Your Hamster’s Cage Correctly Matters
A dirty cage is not just unpleasant to smell — it is a genuine health risk. Bacterial buildup in soiled bedding can cause respiratory infections, wet tail, and skin problems. Accumulated ammonia from urine is particularly dangerous for a hamster’s tiny lungs.
Understanding how to clean a hamster cage correctly means balancing two competing needs: sanitation and scent preservation.
But the opposite extreme is equally damaging. Hamsters rely almost entirely on scent to navigate their world. Their scent glands — located on their hips and flanks — leave invisible markers throughout the cage that tell them where their food is stored, where their nest is, and that they are safe at home.
When you strip all of that scent at once, you do not give your hamster a clean home — you give them an unfamiliar, threatening environment.
The goal of every cage cleaning session is to find the balance: sanitary enough to prevent illness, gentle enough to preserve your hamster’s sense of security.
What You Need Before You Start
Gather these supplies before taking your hamster out of the cage:
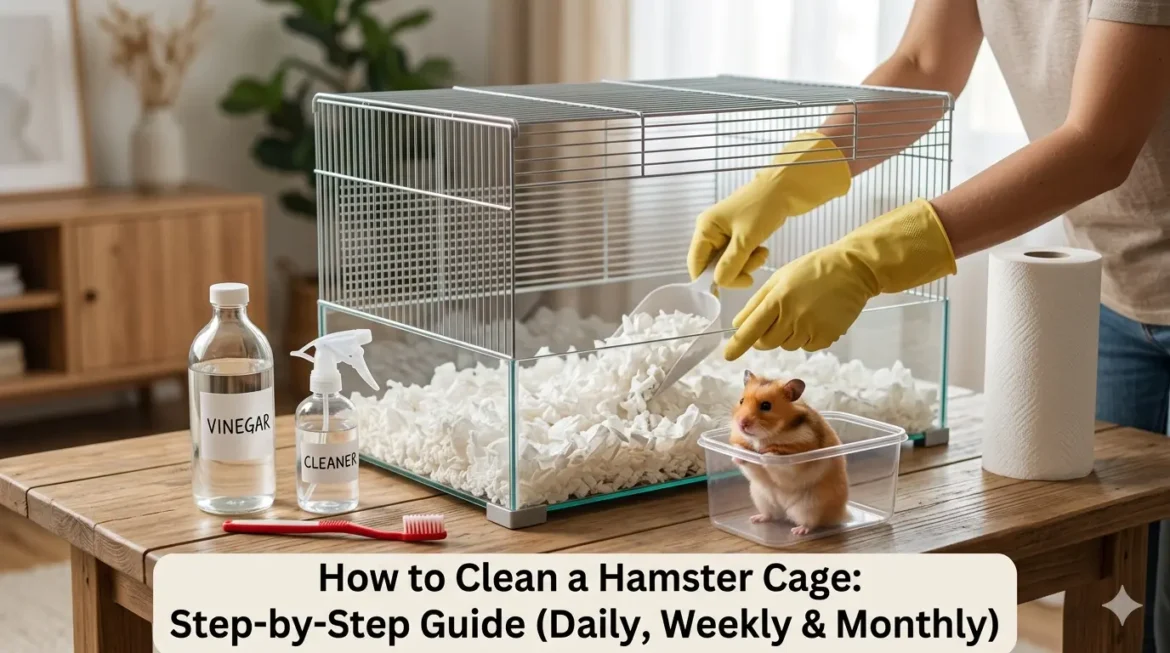
| 🧹 Cleaning Supplies Checklist: • Latex or nitrile gloves (always — hamster waste can carry bacteria) • Secure temporary holding container (travel cage or deep plastic bin) • Mild unscented dish soap • White vinegar (diluted 1:1 with water) OR pet-safe cage spray • Warm water • Scrub brush + old toothbrush (for tight corners and tunnels) • Clean cloth or paper towels • Fresh bedding (minimum 6 inches when refilled) • Small bag or bin for old bedding disposal • A cup or scoop to save clean old bedding |
Note on holding containers: A secure, deep plastic storage bin with air holes works perfectly. Place a small amount of familiar bedding, food, and a water source inside. Never use a cardboard box — hamsters chew through them within minutes.
The Complete Hamster Cage Cleaning Schedule
Different parts of your hamster’s cage have different cleaning needs. This table shows exactly what needs doing and when:
| Task | Daily | Weekly | Monthly |
| Spot clean soiled bedding | ✅ | — | — |
| Remove uneaten fresh food | ✅ | — | — |
| Clean food bowl | ✅ | — | — |
| Clean water bottle/bowl | ✅ | — | — |
| Replace 30–50% of bedding | — | ✅ | — |
| Wipe cage walls & base | — | ✅ | — |
| Clean toys & accessories | — | ✅ | — |
| Full deep clean & disinfect | — | — | ✅ |
| Clean tunnels & wheel | — | — | ✅ |
| Replace ALL bedding | — | — | ✅ |
The schedule above is based on a standard cage with 6+ inches of paper-based bedding and one hamster. If your cage is smaller or your hamster tends to use one corner as a toilet area, spot clean that area daily without fail.
Daily Cleaning: 5 Minutes, Every Day
Daily spot cleaning is the single most effective thing you can do for your hamster’s health. It takes five minutes and prevents the weekly and monthly cleanings from becoming overwhelming.
What to do daily
- Remove visibly soiled or wet bedding from toilet corners — hamsters often use the same corner consistently
- Remove and discard any uneaten fresh food (vegetables, fruit, protein) — these rot within hours
- Wash the food bowl with warm soapy water, rinse well, and refill
- Empty, scrub, and refill the water bottle — check the nozzle for clogs and air bubbles
- Check for hidden food hoards near the nest — remove any spoiled items carefully
| 💡 Tip: Do NOT disturb the main burrow or nesting area during daily spot cleans. Your hamster’s nest is the most scent-important area of the cage. Leave it completely undisturbed unless something is visibly soiled or spoiled. |
Weekly Cleaning: How to Do It Without Stressing Your Hamster
Weekly cleaning involves partially refreshing the bedding and wiping down the cage — but not stripping it bare. The weekly stage of cleaning your hamster cage is where most owners make their biggest mistakes that cause bar-biting, hiding, and stress behaviors
The key rule: save old bedding every single time
Before removing any bedding, scoop out one large cup of dry, clean bedding from the top layer — not the soiled corners, but clean areas near the middle or back. Set this aside. After cleaning, mix this saved bedding into the fresh bedding when you refill. This small cup of familiar-smelling material makes an enormous difference to your hamster’s stress levels.
Weekly cleaning step by step
| Step 1: Move your hamster to a safe temporary space Place your hamster gently in their holding container with familiar bedding, some food, and water. Keep it in a quiet, warm location away from drafts. Never leave your hamster unsupervised in a container they could escape from. |
| Step 2: Save a cup of clean old bedding Using a clean scoop or cup, collect dry, unsoiled bedding from the clean areas of the cage. Set aside in a clean bowl — you will use this at the end. |
| Step 3: Remove 30–50% of old bedding Focus on visibly soiled areas, toilet corners, and wet patches. There is no need to remove all bedding at weekly cleans. Leave the main burrow and nesting area intact if they are not soiled. |
| Step 4: Remove and wash toys, bowls, and accessories Take out food bowls, water bottle, wheel, tunnels, hides, and any toys. Wash all hard items in warm soapy water. Use an old toothbrush for tight spots and inside tunnel sections. Rinse well and set aside to dry. |
| Step 5: Wipe down cage walls, bars, and base Use a damp cloth with diluted white vinegar (1:1 with water) or a fragrance-free pet cage cleaner. Wipe all surfaces — bars, plastic base, ledges, and corners. Pay attention to urine stains — white vinegar dissolves them effectively. Do NOT use scented sprays, bleach, or antibacterial household cleaners. |
| Step 6: Dry all surfaces thoroughly Wipe all surfaces dry with a clean cloth or paper towels. Never replace bedding or return accessories while surfaces are damp — moisture encourages mold growth inside the cage. |
| Step 7: Refill with fresh bedding — and saved bedding This step is the most important part of how to clean a hamster cage without causing stress — the saved bedding carries your hamster’s familiar scent. Add at least 6 inches of fresh paper-based bedding. Mix in the cup of saved old bedding from Step 2. Replace all accessories in the same positions as before — same wheel location, same hide position, same tunnel layout. Familiarity reduces stress. |
| Step 8: Return your hamster Let your hamster re-enter the cage on their own if possible — place the holding container at the cage entrance and let them walk in at their own pace. Offer a favourite treat at the entrance to encourage positive association. Monitor for the next 24 hours — some bar-biting or hiding is normal. If stress behaviours persist beyond 48 hours, keep old bedding next time. |
Monthly Deep Clean: Full Disinfection
Once a month, your hamster’s cage needs a thorough deep clean — including full bedding replacement, complete disinfection of the enclosure, and a detailed clean of all accessories including tunnels, wheels, and wooden items.
Monthly deep clean — what is different from weekly
- Replace ALL bedding — not just soiled sections
- Fully disinfect the cage base, walls, and bars with a vet-safe disinfectant
- Deep clean tunnels with a bottle brush — bacteria accumulate inside
- Inspect wooden toys and hides — replace any that are cracked, soaked, or smell strongly
- Wash the exercise wheel completely, including the axle and spoke areas
- Clean any fabric items — replace if they cannot be fully washed and dried
| 🔬 Best disinfectant for monthly deep clean: F10SC Veterinary Disinfectant — diluted 1:250 with water. This is a hospital-grade disinfectant used by exotic vets and approved for use around small animals. It is highly effective against bacteria, fungi, and viruses — and safe when diluted and rinsed correctly. White vinegar (1:1) is sufficient for weekly cleans but less effective as a disinfectant than F10SC for monthly deep cleans. |
Even during a full monthly clean, save a small amount of clean old bedding and mix it in. The monthly clean is the one time you remove everything — so scent retention is even more important.
Safe vs Dangerous Cleaning Products
This is one of the most important sections in this guide. Hamsters have extremely sensitive respiratory systems. Many common household cleaners that seem mild to us are dangerous to hamsters — even their fumes can cause harm.
| ✅ Safe to Use | ❌ Never Use |
| White vinegar diluted 1:1 with water | Bleach (undiluted) |
| Unscented mild dish soap + warm water | Any scented or antibacterial sprays |
| F10SC veterinary disinfectant (1:250) | Pine or tea tree oil cleaners |
| Pet-safe cage cleaner (fragrance-free) | Dettol or Lysol |
| Plain hot water (rinse only) | Any aerosol sprays near the cage |
| Baby wipes (fragrance-free, for spot) | Bleach-based bathroom cleaners |
| ⚠️ Never clean the cage while your hamster is inside it. Cleaning spray fumes — even from ‘natural’ products — can cause respiratory irritation and distress in a hamster within minutes. |
For a complete list of safe and unsafe products for small animals, the RSPCA small animal care guidelines are a reliable reference.
7 Common Cage Cleaning Mistakes (And How to Fix Them)
Mistake 1 — Cleaning too frequently
Cleaning more than once per week strips all scent markers and causes chronic stress. Stick to spot cleans daily and full refreshes weekly.
Mistake 2 — Replacing all bedding at once
Even during a monthly deep clean, saving a cup of old dry bedding and mixing it back in makes a measurable difference to your hamster’s stress response. Never skip this step.
Mistake 3 — Rearranging accessories after cleaning
Your hamster memorises the layout of their cage by scent and spatial memory. Moving the wheel to the other side, or placing the hide in a different corner, forces them to relearn their entire home. Always return accessories to exactly the same positions.
Mistake 4 — Using scented products
Scented cleaning sprays, scented bedding, or even strongly scented soaps override your hamster’s ability to smell their own scent markers. Always use fragrance-free products.
Mistake 5 — Cleaning during the day
Hamsters are naturally most active from dusk onwards. Cleaning during their peak sleep hours (daytime) causes maximum disruption. Clean in the late afternoon or early evening so your hamster is already waking up and less disturbed.
Mistake 6 — Returning accessories while still damp
Moisture inside a cage creates the perfect environment for mold. All surfaces, accessories, and tunnels must be completely dry before being returned to the cage.
Mistake 7 — Throwing away the food hoard
Hamsters store food underground as a survival behaviour — finding their hoard gone causes genuine panic. During weekly cleans, check for hoards carefully and remove only spoiled food. Leave dry, safe hoarded food in place if possible.
Why Does My Hamster’s Cage Smell? And How to Fix It
If your hamster’s cage smells strongly between cleans, one of the following is usually the cause:
- Cage is too small — waste concentrates faster in a smaller space
- Bedding depth is too shallow — under 4 inches cannot absorb urine effectively
- Spot cleaning is not happening daily — soiled bedding left for days causes rapid odour buildup
- Wrong bedding type — scented bedding masks odour temporarily but does nothing for bacteria
- Diet issue — foods high in water content (too many vegetables) increase urine output
The solution in almost every case is larger cage + deeper bedding + daily spot cleaning. Scented products are not a solution — they are a health risk.
Frequently Asked Questions
1. How often should I clean my hamster’s cage?
Spot clean daily (5 minutes), do a partial bedding refresh weekly (20–30 minutes), and perform a full deep clean with disinfection monthly (45–60 minutes). This three-tier schedule keeps the cage hygienic without over-cleaning, which causes stress.
2. What is the best cleaner to use on a hamster cage?
For weekly cleans, white vinegar diluted 1:1 with water is safe, effective, and dissipates quickly. For monthly deep cleans, F10SC veterinary disinfectant diluted at 1:250 is the gold standard used by exotic vets. Always rinse surfaces thoroughly and allow to dry completely before returning your hamster.
3. Can I use vinegar to clean a hamster cage?
Yes — white vinegar diluted 1:1 with water is one of the safest and most effective cleaners for hamster cages. It dissolves urine stains, kills bacteria, and the smell dissipates completely once dry. Never use undiluted vinegar — rinse surfaces after use.
4. My hamster starts biting the bars after I clean the cage — why?
This is a classic stress response caused by scent loss. When you clean too thoroughly, you erase all of your hamster’s scent markers. The solution is simple: always save a cup of dry old bedding and mix it into the fresh bedding. Return all accessories to their exact previous positions. If bar-biting continues, consider cleaning less aggressively and using a bigger cage.
5. Do I need to clean my hamster’s cage if it doesn’t smell?
Yes. Odour is a late indicator of bacterial buildup — by the time you can smell ammonia clearly, bacteria have been accumulating for days. Stick to a schedule regardless of smell. Prevention is always better than treatment when it comes to hamster respiratory health.
6. How do I clean hamster cage tunnels?
Remove all tunnels and soak in warm soapy water. Use a bottle brush to scrub inside each section — bacteria accumulate in the hidden inner surfaces. Rinse thoroughly and dry completely before returning to the cage. Damp tunnels encourage mold growth.
7. Can I use baby wipes to spot clean?.
Unscented, alcohol-free baby wipes are safe for quick spot cleaning of cage surfaces — wiping a bar, cleaning a corner, or removing a stain. Never use scented wipes, antibacterial wipes, or wipes containing alcohol, as these are toxic to hamsters
8. Should I clean my hamster’s cage when it is pregnant or has pups?
If your hamster is pregnant or has recently given birth, do not clean the cage for at least 14 days after birth. Any disturbance to the nest or the mother’s scent markers during this period can cause infanticide — the mother may eat her young in response to perceived threat. Spot clean toilet corners only, and only if absolutely necessary.
Final Thoughts
Cleaning your hamster’s cage is one of the most impactful things you can do for their health and wellbeing — but only when done correctly. Daily spot cleans prevent the major problems. Weekly partial refreshes keep the cage fresh without destroying familiar scents. Monthly deep cleans ensure bacteria and mold never build up to dangerous levels.
The single habit that makes the biggest difference across all three cleaning tiers is saving a cup of dry old bedding and mixing it back into the fresh bedding every single time. It costs nothing and takes ten seconds — but it can be the difference between a calm, settled hamster and one that bar-chews and hides for days after every clean.
Related Hamster Care Guides
For complete hamster care guidance, these articles work alongside this cleaning guide:
- Hamster Cage Guide: Sizes, Types, Setup & How to Choose the Best One
- Hamster Bedding: How to Choose the Best Bedding for Your Hamster
- Hamster Wet Tail: Symptoms, Causes, Treatment & Survival Guide
- Hamster Diseases: What Every Pet Owner Should Know
- Why Is My Hamster Biting the Cage Bars?
- Hamster Enrichment: 10 Ways to Keep Your Hamster Happy
- How to Take Care of a Hamster: Complete Beginner’s Guide